Layouts in Android
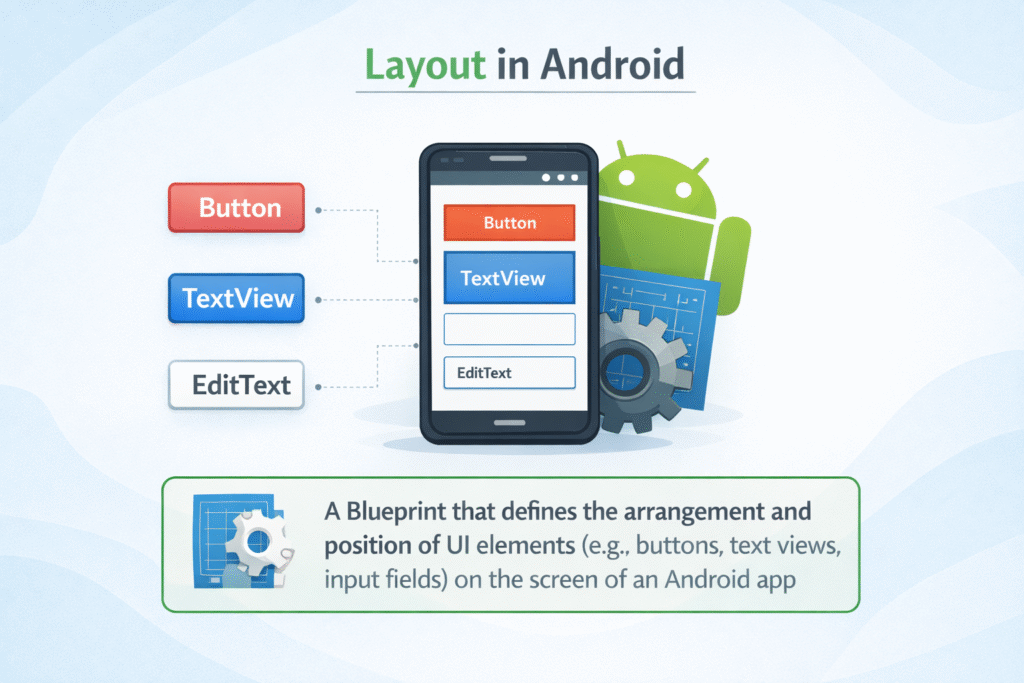
A Layout in Android is a structure that defines the arrangement and position of UI elements (such as buttons, text views, images, and input fields) on the screen of an Android application. It acts as a container that holds and organizes different views in a specific way to create the app’s user interface.
Linear Layout
LinearLayout is a type of layout in Android that arranges its child elements in a single direction, either:
- Vertically (top to bottom)
or - Horizontally (left to right)
This means that UI components are placed one after another in a straight line.
Why LinearLayout is Important for Beginners
Students learning Android often start with LinearLayout because:
✔ It is easy to understand
✔ It helps in learning basic UI arrangement
✔ It is perfect for simple forms and screens
Example situations where LinearLayout is useful:
- Login screen
- Registration form
- Settings menu
- Simple dashboard
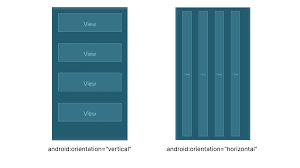
Orientation in LinearLayout
The orientation property decides how views are arranged.
There are two types:
Vertical Orientation
Views appear top to bottom.
Example:
<linearLayout
android:orientation=”vertical”>
Result:
Name
Email
Password
Login Button
Horizontal Orientation
Views appear left to right.
Example:
<linearLayout
android:orientation=”horizontal”>
Basic syntax of Linear Layout
<linearLayout
andorid:layout-width=”match-parent”
andorid:layout-height=”match-parent”
android:orintation=”vertical”>
<!– child views –>
</linearLayout>
Explanation:
- layout_width → width of the view
- layout_height → height of the view
- orientation → vertical or horizontal arrangement
Important Attributes of LinearLayout
1. layout_weight
layout_weight helps divide space proportionally between views.
Example:
<Button
android:layout_width=”0dp”
android:layout_height=”wrap_content”
android:layout_weight=”1″
android:text=”Button 1″/>
<Button
android:layout_width=”0dp”
android:layout_height=”wrap_content”
android:layout_weight=”1″
android:text=”Button 2″/>
Result:
Both buttons take equal space.
2. gravity
gravity controls content alignment inside the layout.
Example:
android:gravity=”center”
Possible values:
bottom
center
left
right
top
3. layout_gravity
layout_gravity controls position of a view inside its parent layout.
Example:
android:layout_gravity=”center”
Advantages of Layouts in Android
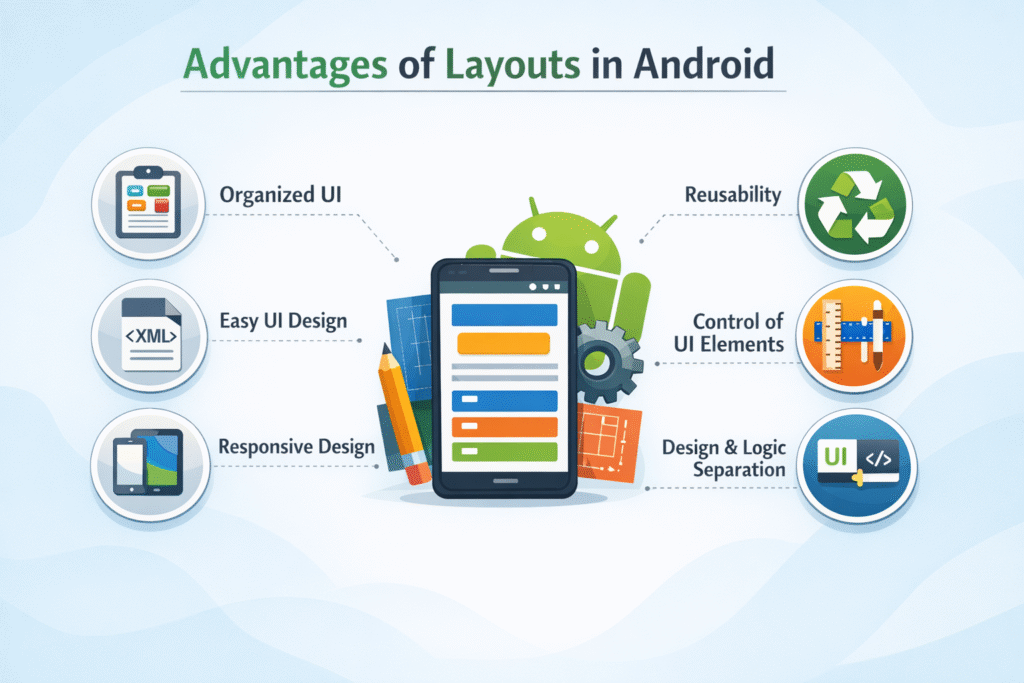
- Layouts help organize different UI components like buttons, text, and images in a structured and systematic way.
- Developers can easily design the user interface using XML layout files, which makes the design process simple and readable.
- Layouts allow apps to adjust properly on different screen sizes and devices such as phones and tablets.
- Layouts can be reused in multiple screens or activities, which saves development time and effort.
- Layouts provide properties to control alignment, spacing, size, and positioning of UI elements.
- Android provides multiple layout options such as LinearLayout, RelativeLayout, and ConstraintLayout to create different UI structures.
Limitations of Layouts in Android
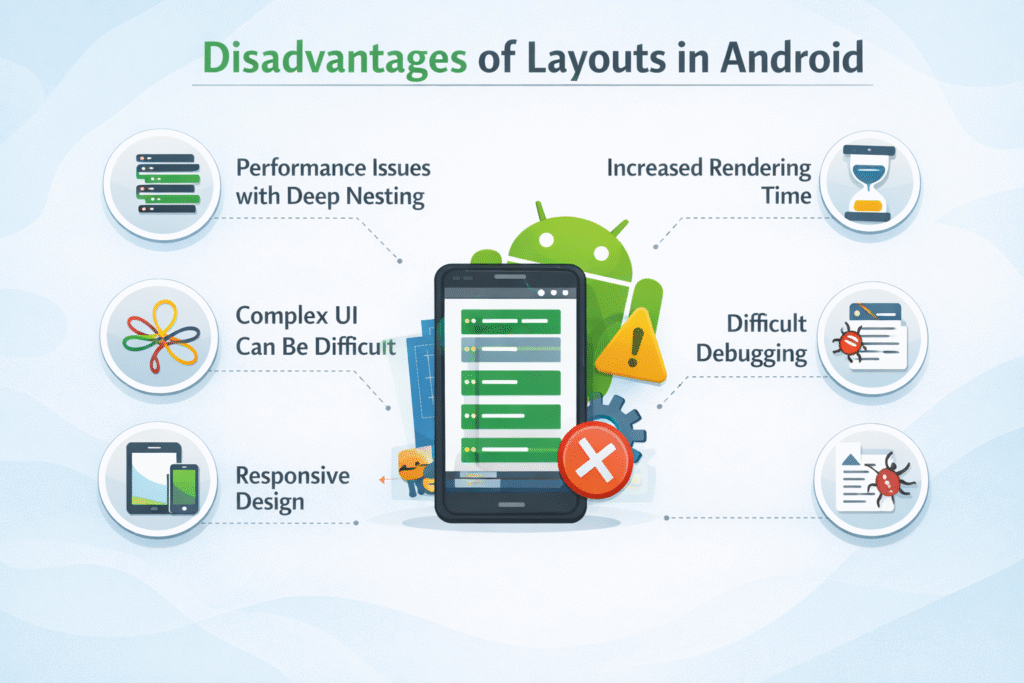
- If too many layouts are nested inside each other, it can slow down the app performance.
- Designing complex user interfaces with basic layouts can become difficult and confusing.
- More layouts and views increase the time required to load and render the screen.
- If the layout structure becomes very large, finding and fixing design errors becomes harder.